
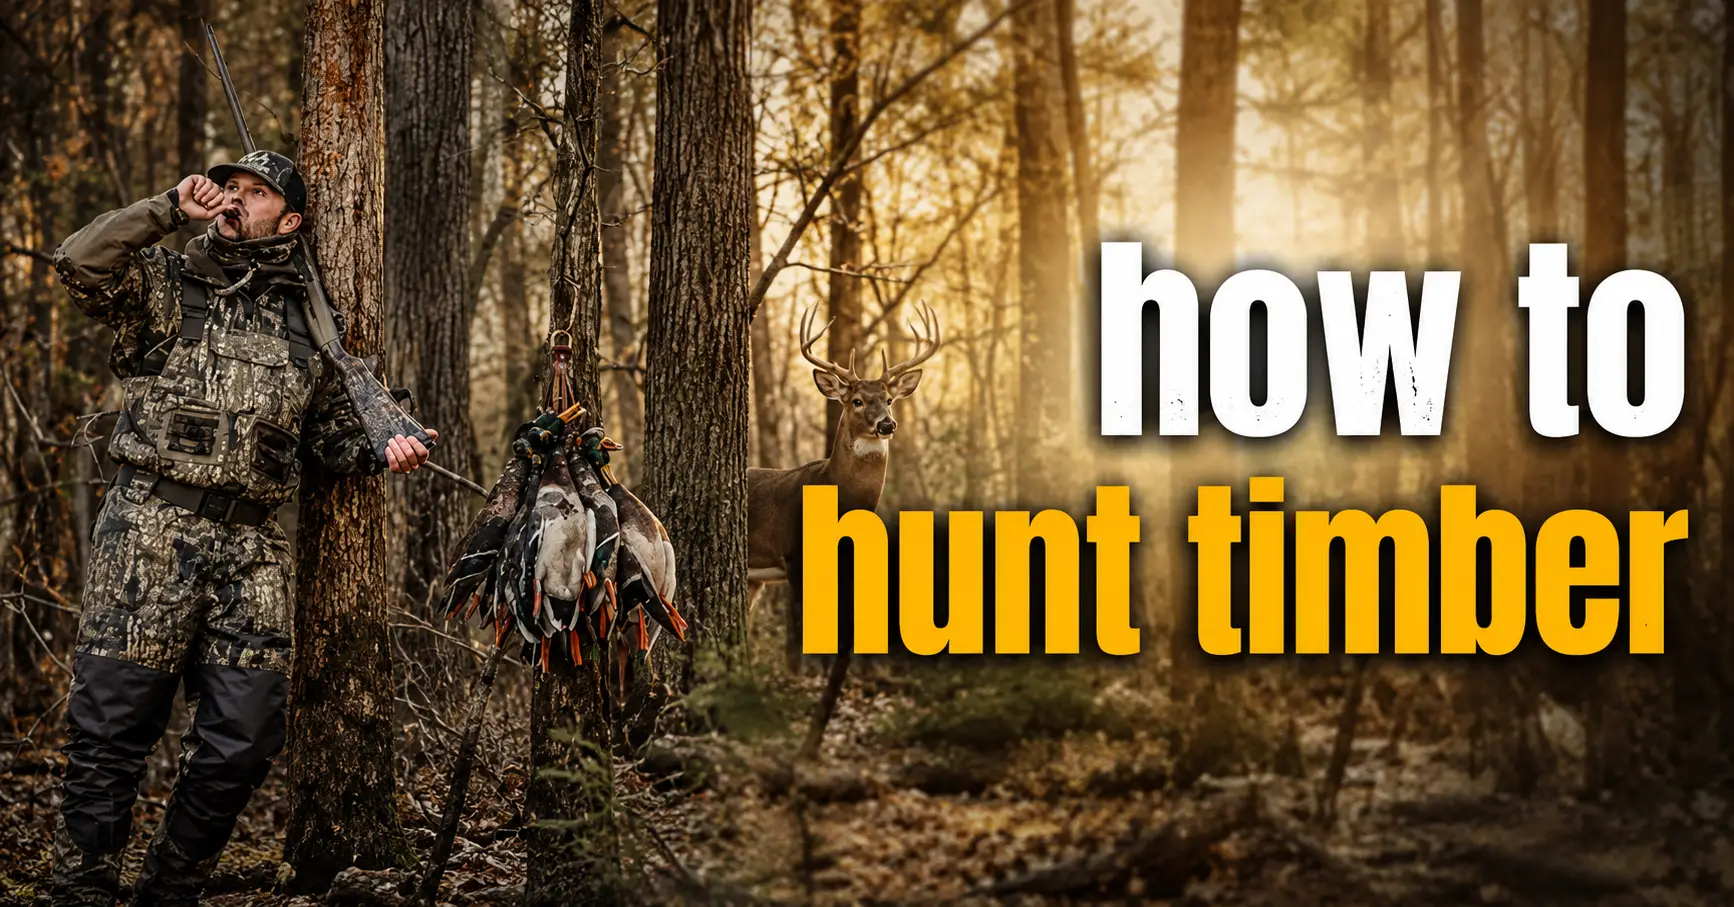

Learning how to hunt timber means learning to read wooded habitat where visibility is limited, sound carries unpredictably, and wind can shift around ridges, hollows, creek bottoms, and dense cover. Timber may include hardwood forests, pine stands, mixed woodland, young regrowth, and old logging corridors.
This guide explains how to scout terrain features, plan safe access, account for wind and thermals, choose a legal setup, move quietly, and make ethical decisions. Success depends on local laws, species behavior, season, weather, pressure, skill, and patience.
Quick Answer
To hunt timbers effectively, first confirm that hunting and access are legal, then scout the edges for fresh trails, browse, bedding cover, and terrain funnels. Set up where the wind carries your scent away from expected movement, use cover to hide your outline, and watch the transition between young growth and mature timber. Take only a clearly identified, legal shot with a safe background and within your practiced ability.
Important Legal and Safety Notice Before You Hunt
Hunting regulations vary by country, state, province, county, species, season, land type, and weapon. Check the current rules published by the official wildlife agency responsible for the area before entering the field.
Understanding Timber Habitat
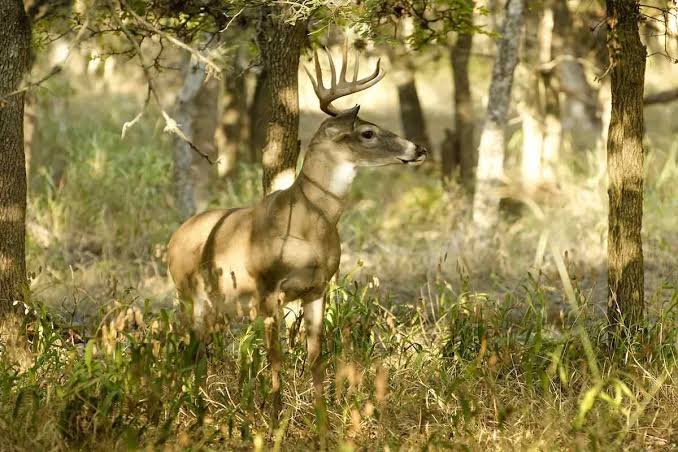
Timber habitat is rarely uniform. A large wooded property may contain mature hardwood forests, dense pine stands, creek bottoms, open ridges, young regrowth, brushy cuts, old logging roads, wetlands, and small openings. Each habitat type offers a different combination of food, cover, water, visibility, and security.
Animals usually do not move randomly through the woods. Their travel is often influenced by terrain, vegetation density, seasonal food sources, wind direction, hunting pressure, and the location of bedding or escape cover. Learning how these features connect is one of the most important parts of hunting timber successfully.
Mature hardwoods may provide seasonal food such as acorns, nuts, browse, and fallen fruit. Dense pines and young regrowth often provide thermal cover, bedding security, and protection from wind. Creek bottoms may offer water, soft ground for tracks, thick vegetation, and natural travel corridors. Ridges, saddles, benches, and old logging roads can make movement easier by reducing the amount of steep terrain an animal must cross.
The most productive locations are often transition zones where two or more habitat types meet. Examples include mature hardwoods bordering young growth, pines meeting an open ridge, a logging road crossing a creek bottom, or a narrow strip of timber connecting bedding cover with a feeding area. These transitions may offer animals several needs in one small area, including food, concealment, and an efficient travel route.
High-Value Features to Scout
When scouting timber, focus on features that naturally guide or restrict movement. These locations are often more useful than choosing a setup simply because the woods look attractive.
Saddles and Low Gaps Between Ridges
A saddle is a low point between two higher areas on a ridge. Animals may use saddles because crossing there requires less effort than climbing over a steeper or higher section. Saddles can also connect bedding areas, feeding cover, creek bottoms, and opposite sides of a ridge.
Look for trails, tracks, droppings, rubs, or disturbed leaves near the lowest part of the saddle. Wind can behave unpredictably in these locations, especially when air moves through the gap, so observe conditions carefully before selecting a hunting setup.
Benches and Flatter Shelves on Slopes
Benches are flatter areas located along the side of a hill or ridge. They may be narrow shelves or broad, level sections surrounded by steeper terrain. Animals often use benches because they provide easier walking, possible bedding cover, and a route that avoids climbing directly up or down a steep slope.
Scout the upper and lower edges of a bench, as well as any point where a trail enters from a drainage, saddle, or ridge. A bench containing thick cover, fresh browse, or nearby water may be especially valuable.
Creek Crossings and Drainage Heads
Creeks, wet drains, and steep gullies can limit movement. Animals often cross where the banks are lower, the water is shallower, or a natural opening makes travel easier. These crossings may contain clear tracks, muddy impressions, hair on nearby vegetation, or several trails merging into one route.
The head of a drainage can also be productive because it may connect two hillsides without forcing an animal to descend into the deepest part of the creek bottom. Pay attention to small terrain changes, because even a shallow depression can influence travel.
Use extra caution around water. Mud, unstable banks, submerged holes, slippery rocks, and sudden changes in water level can create serious hazards. Avoid crossing water when depth, current, footing, or weather conditions are uncertain.
Logging-Road Bends and Intersections
Old logging roads can act as travel corridors because they provide easier walking and more open visibility than the surrounding woods. Bends, intersections, creek crossings, and places where roads narrow may concentrate movement.
However, logging roads can also receive heavy hunting pressure and recreational use. Before selecting a setup, confirm whether the road is open to vehicles, foot travel, bicycles, forestry equipment, or other users. Never shoot along a road or toward a bend where a person, vehicle, or worker could appear.
Habitat Edges
A habitat edge is the boundary where two different types of cover meet. Examples include hardwoods meeting pines, mature timber bordering young regrowth, forest meeting a field, or dry ground bordering a wet area.
Edges may provide food on one side and security cover on the other. Animals can travel along these boundaries while remaining close to concealment. Scout both the visible edge and the interior edge located a short distance inside thicker cover, because pressured animals may avoid walking directly in the open.
Narrow Strips of Cover Between Food and Bedding Areas
A narrow strip of brush, timber, or thick vegetation may connect two larger habitat areas. These connecting strips are sometimes called travel corridors or funnels because they can guide movement through a limited space.
Good examples include a band of trees between two fields, a brushy drainage running from a ridge to a creek bottom, or a strip of young growth connecting feeding cover with a bedding area. Look for multiple trails, fresh tracks, worn vegetation, and places where terrain or open ground prevents animals from spreading out.
Timber Points and Inside Corners
A timber point is a projection of wooded cover extending into a field, cutover, wetland, or younger habitat. An inside corner is a recessed corner where open or young habitat pushes into mature timber. Both features can influence how animals enter and leave feeding areas.
These locations may allow animals to remain close to cover while checking an opening before stepping into it. Scout trails approaching from several directions, but plan your access carefully so your scent does not blow into the cover you expect animals to use.
Isolated Cover and Small Dry Islands
Small patches of thick cover, elevated ground, or isolated trees can be important in otherwise open or wet terrain. Animals may use these areas for bedding, resting, observation, or temporary security.
A small feature can be productive even when it appears insignificant on a map. Compare aerial imagery with what you see on the ground, because changes in vegetation, flooding, logging, or storm damage may not appear on older maps.
Fresh Sign Worth Prioritizing
Finding sign is only the first step. The age, location, and concentration of the sign matter. Old tracks or weathered rubs show that animals used the area at some point, but they do not prove the location is active now.
Prioritize sign that appears recent and is supported by several types of evidence. For example, a fresh trail combined with current tracks, new droppings, and recently browsed vegetation is usually more meaningful than one isolated track.
Current Tracks and Droppings
Fresh tracks may have sharp edges, visible detail, and limited debris inside the impression. Tracks in mud, snow, sand, or soft logging roads can help reveal direction of travel and frequency of use.
Fresh droppings may provide another indication of recent activity. However, age can be difficult to judge because moisture, shade, temperature, and rain affect appearance. Use droppings as one part of the overall pattern rather than relying on them alone.
Recently Browsed Plants and Feeding Areas
Inspect leaves, twigs, grasses, crops, nuts, fruit, and other locally important food sources. Fresh feeding activity may include clipped stems, disturbed leaves, exposed soil, cracked shells, or recently moved vegetation.
Food availability changes through the season. An area that was active several weeks ago may become less productive when another food source becomes available. Continue checking current conditions instead of assuming animals will follow the same pattern all season.
Active Trails Through Funnels and Crossings
An active trail may have exposed soil, compressed leaves, broken vegetation, tracks, droppings, or several smaller paths merging into one route. Trails located in saddles, creek crossings, fence gaps, narrow cover strips, and logging-road intersections deserve close attention.
Not every visible trail is used by the game species you intend to hunt. Confirm the species through tracks, droppings, hair, feeding sign, or direct observation before planning a setup.
Fresh Rubs, Scrapes, Beds, Feathers, or Rooting
Species-specific sign can reveal how animals are using the area. Fresh rubs may show recently exposed wood and moist bark. Active scrapes may contain freshly disturbed soil, tracks, overhanging vegetation, or repeated visits. Beds may show flattened vegetation, hair, tracks, or nearby droppings.
Feathers, scratching, dusting areas, rooting, wallows, tracks, and feeding disturbance may also be relevant depending on the legal species. Learn to distinguish fresh sign from old, weathered evidence and from disturbance caused by livestock, pets, people, or machinery.
Direction and Pattern Matter More Than One Sign
Try to determine where the animal was coming from, where it was going, and why it used that route. A track leading from thick cover toward a feeding area may suggest an evening travel pattern, while movement from feeding cover toward secure bedding may be more relevant in the morning.
One sign does not create a complete hunting plan. Combine sign with terrain, wind, access, food, water, bedding cover, weather, and hunting pressure. The strongest locations are usually those where several useful factors overlap.
How to Confirm That a Location Is Still Active
Return under different conditions or observe from a distance when possible. Look for new tracks after rain, additional browsing, changing trail use, or direct sightings. A trail camera may be useful where legal, but it should not replace careful field observation.
Avoid checking the area so often that your scent, tracks, noise, or presence changes animal behavior. Use low-impact observation points, favorable wind, and legal access routes. When the evidence is weak or outdated, continue scouting instead of forcing a setup.
Turn Scouting Information Into a Hunting Plan
After identifying an active feature, choose a setup based on the expected direction of movement, wind, visibility, access, and background safety. Prepare more than one location because wind, weather, pressure, and food patterns can change.
Your entry route should avoid crossing the main trail or bedding area. Your exit should also prevent unnecessary disturbance, especially after an evening hunt. Before hunting, identify roads, homes, livestock areas, trails, neighboring properties, and any direction that would be unsafe for a shot.
The best timber setup is not always the place with the most sign. It is the location where you can enter legally, remain undetected, clearly identify the animal, maintain a safe background, stay within your practiced range, and recover the game responsibly.
- Carry the required hunting license, permits, tags, and identification.
- Confirm season dates, legal hunting hours, bag limits, and harvest-reporting rules.
- Verify legal firearms, bows, ammunition, broadheads, and transport requirements.
- Confirm public access or obtain clear private-land permission.
- Wear blaze orange or other visibility clothing when required.
- Treat every firearm as loaded and keep the muzzle pointed in a safe direction.
- Identify the target and everything beyond it before considering a shot.
- Never shoot toward roads, homes, people, vehicles, livestock, equipment, trails, or unclear movement.
- Carry navigation, weather, hydration, first aid, and emergency communication equipment.
- Complete hunter education and hunt with an experienced, ethical mentor when possible.
What You Need Before You Start
- Valid license, permits, tags, and a current regulation summary
- A legal hunting weapon suited to your practiced ability
- Required visibility clothing and weather-appropriate layers
- Sturdy boots with traction for slash, mud, rocks, and logging roads
- Binoculars for safe observation and target identification
- Paper map plus compass, GPS, or a hunting map application
- First aid kit, water, food, headlamp, whistle, and emergency communication
- Rangefinder if legal and useful for judging distance
- Approved full-body harness and fall-arrest equipment for tree-stand hunting
- Clean gloves, game bags, cooler, and legal transport supplies for harvest care
How to Hunt Timber: Step-by-Step Guide
Step 1: Verify Current Laws and Access
Confirm the species, season, legal hours, licenses, tags, weapon rules, reporting requirements, and land status. Check for temporary closures, active logging, and special public-land restrictions.
Step 2: Study Maps Before Entering
Use topographic, aerial, and property maps to identify ridges, saddles, benches, drainages, creek crossings, logging roads, fields, and habitat edges. Mark roads, homes, trails, and neighboring parcels that affect safety.
Step 3: Choose a Legal Area and Route
Confirm that both the hunting area and your access route are legal. Do not cross private property without permission, even when public timber lies beyond it.
Step 4: Scout Fresh Sign
Inspect terrain funnels, trails, food sources, bedding cover, and crossings. Fresh tracks, droppings, browsing, rubs, scrapes, beds, feathers, or rooting are more useful than old sign.
Step 5: Prepare Gear and Navigation
Practice with your legal hunting equipment, inspect safety gear, secure loose items, check batteries, and carry a paper map and compass as backup.
Step 6: Plan for Wind and Thermals
Choose an entry and setup that keep scent away from expected movement. In hilly timber, warming air often rises and cooling air settles, changing scent direction.
Step 7: Select a Safe Setup
Use a legal tree stand, ground blind, natural cover position, or still-hunting route. Ensure clear identification, an unobstructed lane, a safe background, and a practical exit.
Step 8: Move Slowly and Observe
Take controlled steps, avoid dry sticks, pause often, listen, and scan with binoculars. Keep your firearm or bow pointed safely and never stalk unidentified movement.
Step 9: Confirm the Target and Background
Identify the legal animal and everything beyond it. Never shoot at sound, color, partial movement, through brush, toward a skyline, or in the direction of roads, homes, people, livestock, or trails.
Step 10: Take Only an Ethical Shot
Stay within your practiced ability and pass any rushed, obstructed, uncertain, or unsafe opportunity.
Step 11: Follow Recovery and Reporting Rules
Mark the last known location, follow legal recovery procedures, respect property boundaries, validate tags, and complete required reporting.
Step 12: Handle the Harvest Responsibly
Use clean tools and gloves, cool meat promptly, follow transport rules, retain required evidence, and avoid waste.
Best Places and Conditions for Timber Hunting
| Factor | What to Look For | Why It Matters |
|---|---|---|
| Terrain | Saddles, benches, creek crossings, drainage heads, and narrow ridges | These features may concentrate movement through large wooded areas. |
| Edges | Mature timber beside young growth, fields, pines, or water | Edges combine food, cover, and travel structure. |
| Wind | Crosswind or slightly favorable wind relative to expected travel | Helps keep scent away from animals before they enter view. |
| Thermals | Rising air after warming and settling air after cooling | Thermals can override the general wind forecast. |
| Pressure | Secondary routes away from obvious access points | Animals may shift toward less disturbed cover. |
| Weather | Safe, stable conditions with manageable wind and visibility | Improves observation and decision-making. |
Helpful Tips for Better Results
- Scout from a distance first so you do not contaminate the best edge with scent.
- Mark several backup setups for different wind directions.
- Use binoculars to study small pockets of cover before assuming the cut is empty.
- Keep your silhouette below the skyline when approaching an overlook.
- Focus on fresh sign rather than the most dramatic old sign.
- Expect pressure to change animal movement throughout the season.
- Record wind, weather, sightings, tracks, and access conditions after every hunt.
Common Mistakes to Avoid
- Entering without checking current regulations or property boundaries
- Walking through the center and alerting animals before the hunt begins
- Ignoring thermals on slopes and drainages
- Setting up where the expected wind blows directly into cover
- Watching only the open center and overlooking shaded edges
- Using a scope to scan unidentified movement
- Taking a long, rushed, obstructed, or unsafe shot
- Failing to account for workers, equipment, hikers, roads, or neighboring homes
- Using a tree stand without a full-body harness
- Having no plan for recovery, reporting, transport, or meat cooling
Troubleshooting Common Problems
| Problem | Possible Cause | What to Do |
|---|---|---|
| No animals appear | Old sign, poor timing, pressure, bad wind, or inactive food source | Re-scout for fresh sign, change edges, and try a legal setup for a different wind or time period. |
| Animals stop before entering the opening | Your scent, noise, silhouette, or blind placement is exposed | Move farther downwind, improve concealment, and use a quieter access route. |
| Visibility is too limited | The regeneration is older or denser than expected | Focus on roads, trails, corners, high points, and small openings rather than the whole cut. |
| Too many hunters use the area | Easy access or a popular overlook | Choose another legal area, hunt a less obvious edge, or adjust timing while maintaining safe separation. |
| Boundary is unclear | Maps conflict or signs are missing | Stop and verify ownership with official records or the land manager before continuing. |
| Wind changes after setup | Weather shift or changing thermals | Move to a prepared backup location or leave without crossing the active area. |
| Weather becomes unsafe | Storms, fog, ice, heat, or high wind | Unload or secure equipment as appropriate and leave by the safest planned route. |
Ethical Hunting and Conservation
Ethical hunting means obeying seasons and limits, respecting wildlife, using legal methods, practicing before the season, and passing any shot that is unsafe or beyond your ability. It also means respecting landowners, forestry workers, other hunters, hikers, and nearby communities.
Use the harvest responsibly, report it when required, avoid damaging young trees or roads, pack out trash, and leave gates and access points as you found them. License and permit revenue often supports wildlife management, but conservation also depends on responsible conduct in the field.
When to Get More Training or Professional Guidance
Seek instruction from an official hunter education program, certified instructor, wildlife agency, or experienced ethical mentor when you are unfamiliar with firearms, bows, tree stands, navigation, property boundaries, recovery, or meat care. Do not use the field as the place to learn basic weapon handling.
After the Hunt: Gear Care and Learning
- Unload, clean, transport, and store firearms or bows according to law and manufacturer guidance.
- Dry clothing, inspect boots, and replace used first aid or emergency supplies.
- Record wind, weather, access, sign, sightings, and pressure.
- Complete required harvest reports and retain legal records.
- Review what worked and update backup setups before the next trip.
Frequently Asked Questions: How to Hunt Timber
1. What does hunting timber mean?
It means hunting legal game in wooded habitat such as hardwoods, pine stands, creek bottoms, ridges, and mixed forest while using terrain, cover, wind, and fresh sign to plan safely.
2. Is timber hunting suitable for beginners?
Yes, but limited visibility and navigation challenges require hunter education, practice, reliable maps, and preferably an experienced mentor.
3. What game species are commonly found in timber?
Depending on location and law, timber may hold deer, elk, turkey, bear, hogs, small game, and other legal species. Verify current regulations.
4. What terrain features should I scout first?
Start with saddles, benches, creek crossings, drainage heads, logging roads, field edges, and narrow strips of cover.
5. How important is wind direction?
It is critical because animals may be close before you see them. Keep your scent away from likely bedding areas and travel routes.
6. What are thermals?
Thermals are temperature-driven air currents. Air often rises as slopes warm and settles as they cool, changing scent direction.
7. What time of day is best?
Early morning and late afternoon are common, but movement depends on species, season, pressure, food, and weather.
8. Should I hunt ridges or creek bottoms?
Both can be productive. Choose based on fresh sign, wind, thermals, access, and a safe background.
9. How do I move quietly through timber?
Take short steps, avoid dry sticks, secure loose gear, pause often, and use favorable wind or light rain to reduce noise.
10. Can I still-hunt in timber?
Yes where legal. Move very slowly, stop often, maintain muzzle control, and identify the target and background before any shot.
11. Is a tree stand effective?
Yes when legal and safely placed. Use a full-body harness and approved fall-arrest system from the ground up.
12. Can I use a ground blind?
Yes where legal. Place it on a safe travel route without blocking roads, trails, or other users.
13. How do I avoid getting lost?
Carry a paper map and compass plus a GPS or phone app, mark your vehicle and exit routes, and tell someone your plan.
14. What if my phone or GPS fails?
Stop, use your map and compass, follow the planned route, and use emergency communication if needed.
15. How do I identify a safe shooting lane?
The lane must allow clear identification, an unobstructed path, and a safe background with no people, roads, homes, livestock, or trails.
16. What is an ethical shot opportunity?
It is a legal, unobstructed shot within your practiced ability with a clearly identified target and safe background.
17. How does hunting pressure affect timber animals?
Animals may use thicker cover, secondary routes, or different movement times. Scout beyond obvious access while remaining legal and safe.
18. What weather is best?
Cool, stable weather can be comfortable, while light rain may reduce noise. Avoid dangerous wind, lightning, ice, flooding, heat, or fog.
19. How do habitat edges help?
Edges join food, cover, and travel habitat, making them useful places to scout for current movement.
20. How far should I set up from bedding cover?
Far enough to avoid alerting animals with scent or noise, but close enough to observe a legal route within your practiced range.
21. How can logging roads help?
They may provide visibility, quiet travel, and crossings, but they can also attract hunters. Confirm access and never shoot along an occupied road.
22. Can I hunt public timber?
Often yes, but verify the parcel, boundaries, parking, season, weapon rules, and temporary closures.
23. How do I get permission for private timber?
Contact the owner respectfully, discuss boundaries and property rules, and obtain written permission when required or practical.
24. What visibility clothing should I wear?
Wear blaze orange or other visibility clothing as required by current regulations.
25. What gear is essential?
Carry licenses, tags, visibility clothing, navigation, sturdy boots, binoculars, first aid, water, a headlamp, and emergency communication.
26. Do I need binoculars in dense woods?
Yes. They help identify partial movement and openings. Never use a riflescope as a general observation tool.
27. How should I prepare for a tree stand?
Inspect the stand, straps, steps, and tree; use a harness and lifeline; and haul equipment with a line.
28. How do I manage scent?
Prioritize wind and route planning, keep gear reasonably clean, and avoid crossing expected travel routes.
29. What are common beginner mistakes?
Ignoring wind, moving too fast, relying only on electronics, entering bedding cover, and taking obstructed or rushed shots.
30. What should I do if I see another hunter?
Make your presence known safely, keep your weapon pointed safely, avoid crowding, and relocate if separation is uncertain.
31. How do I recover game in thick cover?
Mark the last known location, follow legal recovery practices, respect boundaries, and seek experienced help when permitted.
32. What should I do after harvest?
Complete tagging and reporting, cool the meat promptly, follow transport laws, and avoid waste.
33. When should I stop the hunt?
Stop when weather becomes dangerous, you are disoriented, equipment fails, or safe identification and background cannot be maintained.
34. How can I improve after each hunt?
Record wind, weather, access, sign, sightings, pressure, and what affected your setup.
35. When should I seek more training?
Get help when you are new to weapons, tree stands, navigation, boundaries, recovery, or meat care.
Read more: How to Hunt Ducks on Public Land: A Beginner-Friendly Guide